DIY Tutorial: How To Make A Horseshoe Dreamcatcher
By Tracie Moats
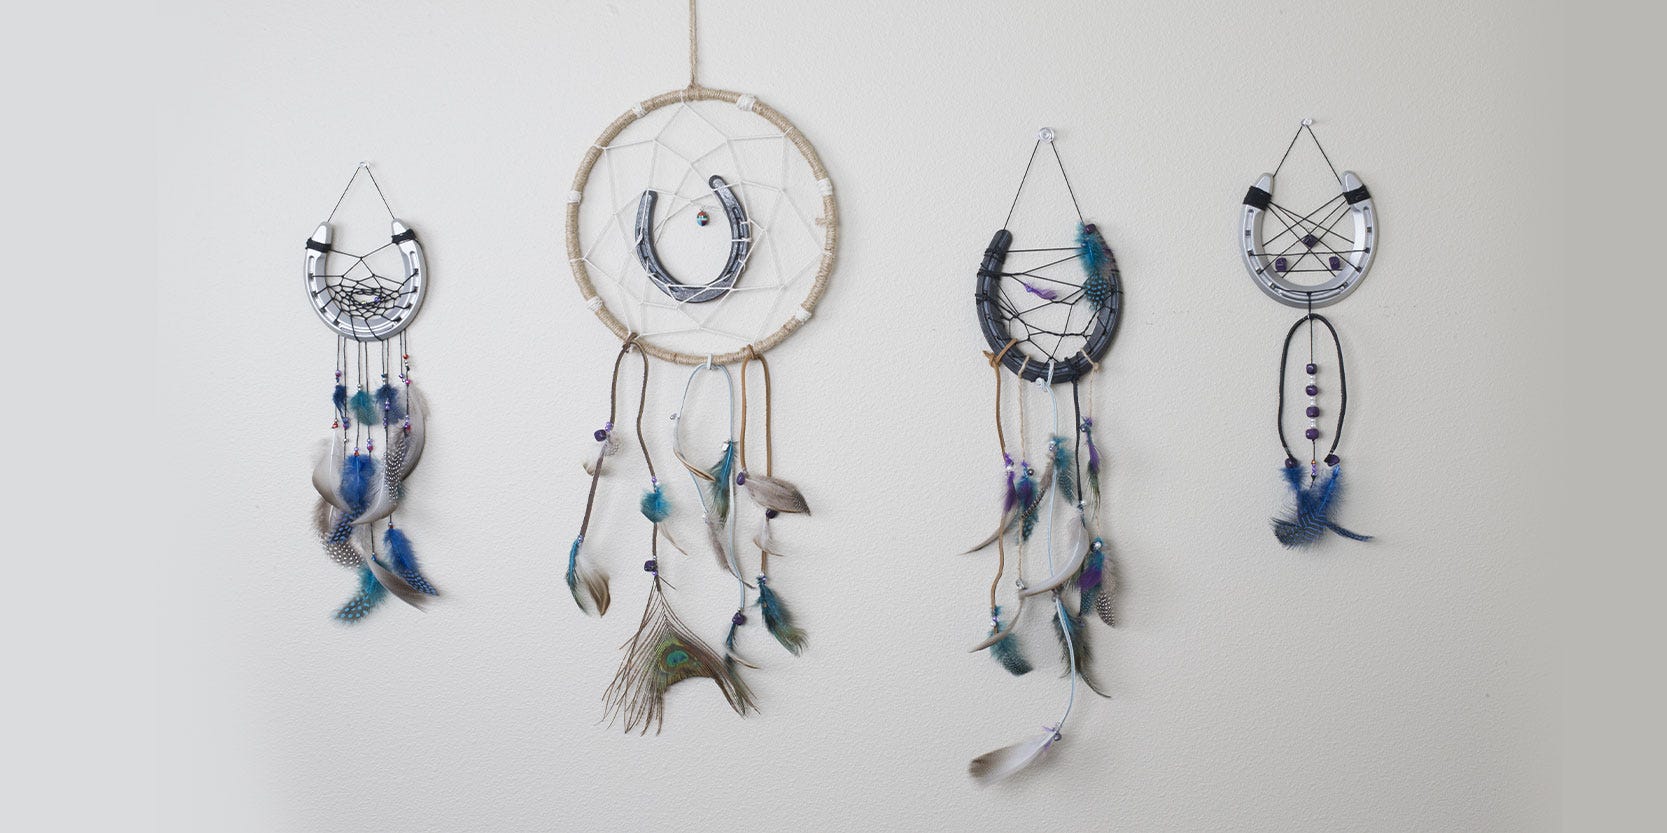
Thanks to the beautiful designs and unique history behind them, dreamcatchers have always been a popular craft. Colorful feathers and intricate designs are the hallmark of these pieces, making them a great gift for the home.
I just so happened to have been looking for something special to hang in my daughter's bedroom. So with that in mind, I turned to creating a dreamcatcher for her. However, in the spirit of our Northwest roots, I added some good North 40 flare into the mix.
The end result turned out great and my daughter loves it!
So if you're curious how to make your own horseshoe dreamcatcher, below is a step-by-step tutorial--we've linked up some products from our fly fishing department because they are the ones we used in the video. Feathers, beads and more are all available in this blog, or you can use what you have around your own house.
Materials You'll need in this Horseshoe Dream Catcher DIY
6 Steps to Make a Horseshoe Dreamcatcher
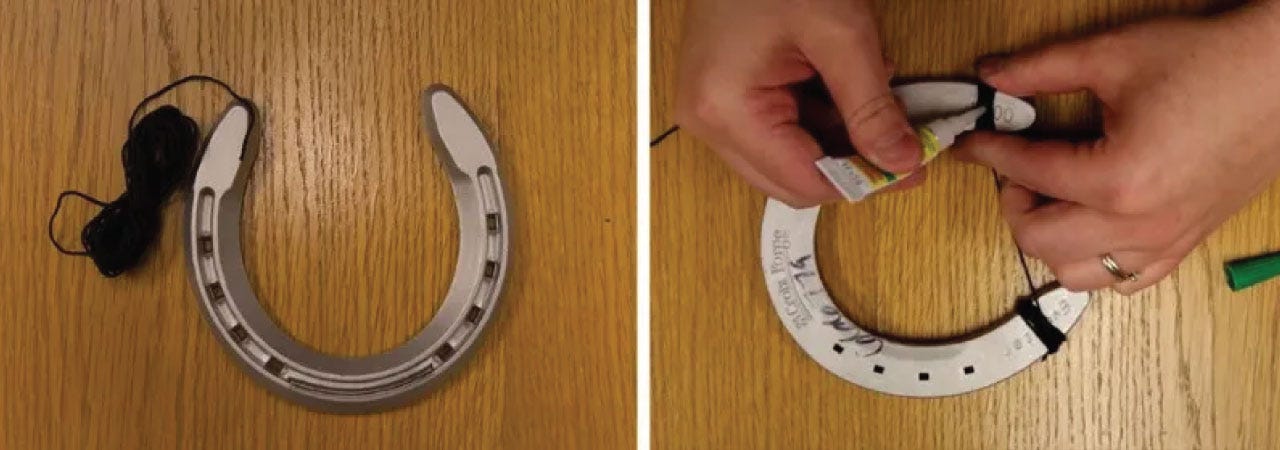
Step 1: Gather Your Supplies
My favorite choice for horseshoes are aluminum. They are fairly easy to find and they are super lightweight compared to traditional horseshoes. Choose your string. I wanted to offset the light silver aluminum horseshoe, so I choose a thinner black string. I found a wall of colored feathers in our North 40 Fly Shop along with some decorative fishing beads. There are endless possibilities for decorating so let your imagination run wild.
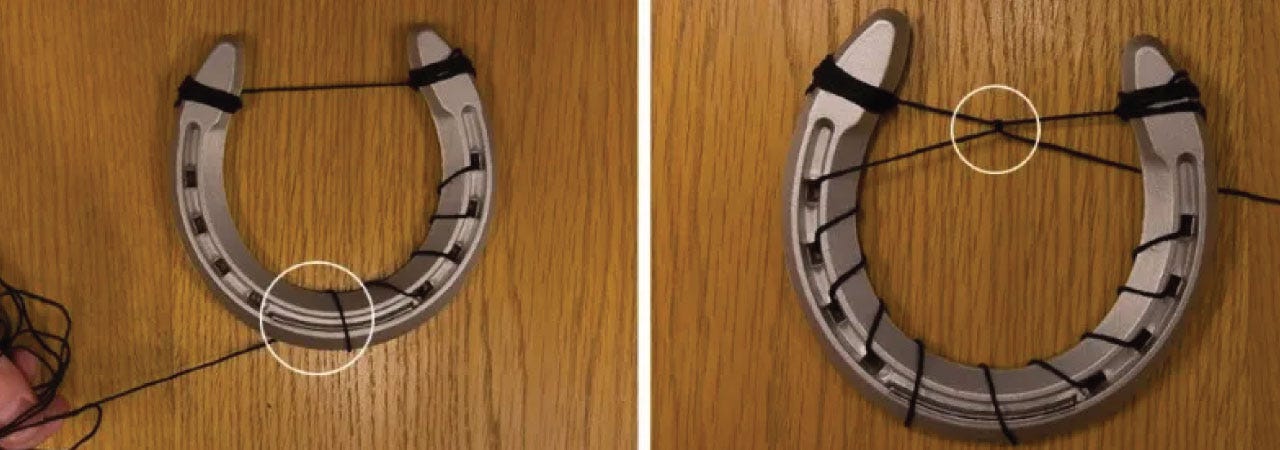
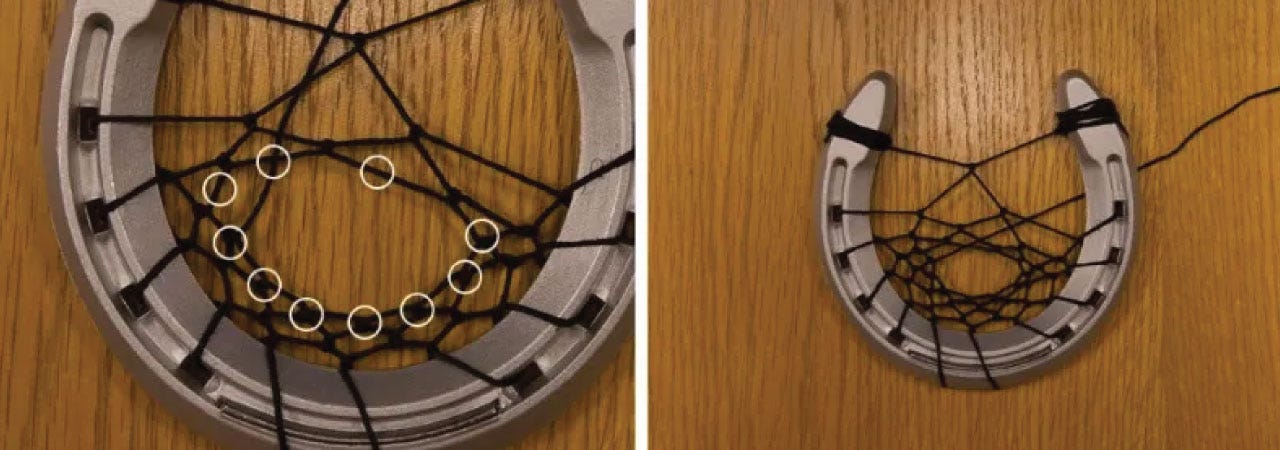
Step 2: Close Off The Horseshoe
Start on the right side with the front of your horseshoe facing you. Tie a secure knot and wrap the string/cord around several times. (Tip: put a small dot of super glue on your string to keep it extra secure) Then cross the top of your horseshoe and wrap your string around the left side several times to make your string snug and secure.
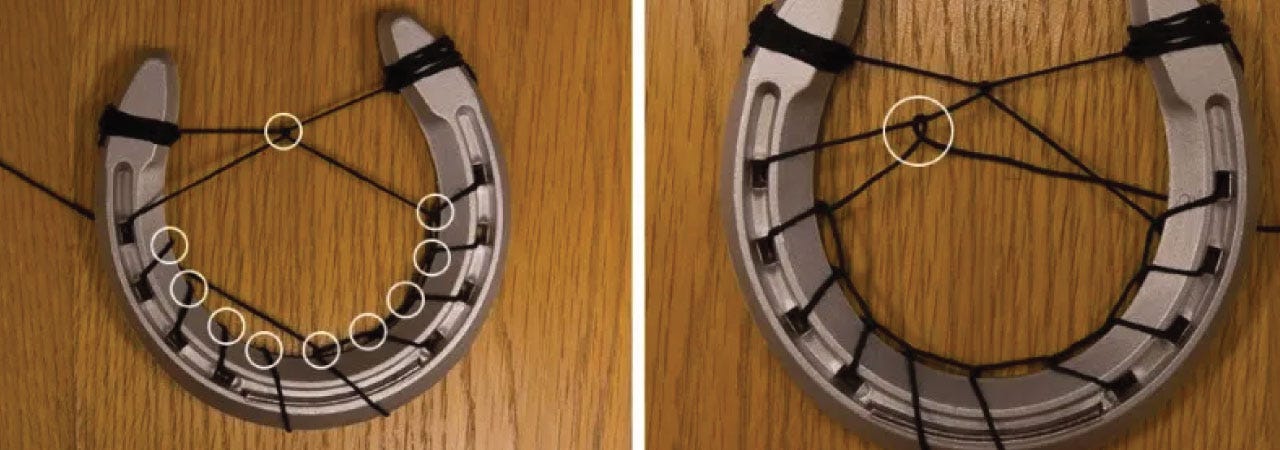
Step 3: Weave The Web
Now that you have a snug line of string across the top, you can begin weaving your string inside each of the horseshoe holes. Try to keep your string as snug as possible while weaving so you don't unravel your progress.
Wrap your string around the bottom of the horseshoe once or twice to give yourself extra loops for weaving. Once you've gone all the way around the horseshoe, you need to loop over the top string and begin looping through each middle of the previous loops you made. Continue looping - slowly weaving the circle smaller and smaller.
As the circle gets smaller, pull and tighten the string to keep your web tidy. Decide how small or large you want the center hole.
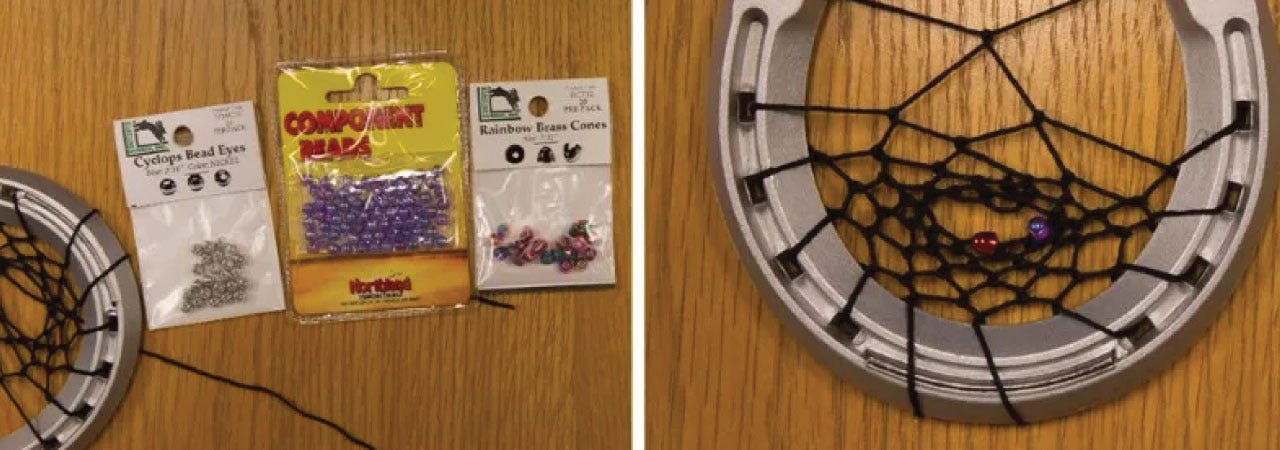
Step 4: Beads In The Web
Pick one or two beads and string onto your line. Continue to loop through the middle of each loop. When you have the desired amount of beads, tie it off. To tie it off, end on a loop and knot where the circle looks somewhat uniform. Pull the string tight and tie a knot. A double knot works best. Trim the remaining string and your web is complete.
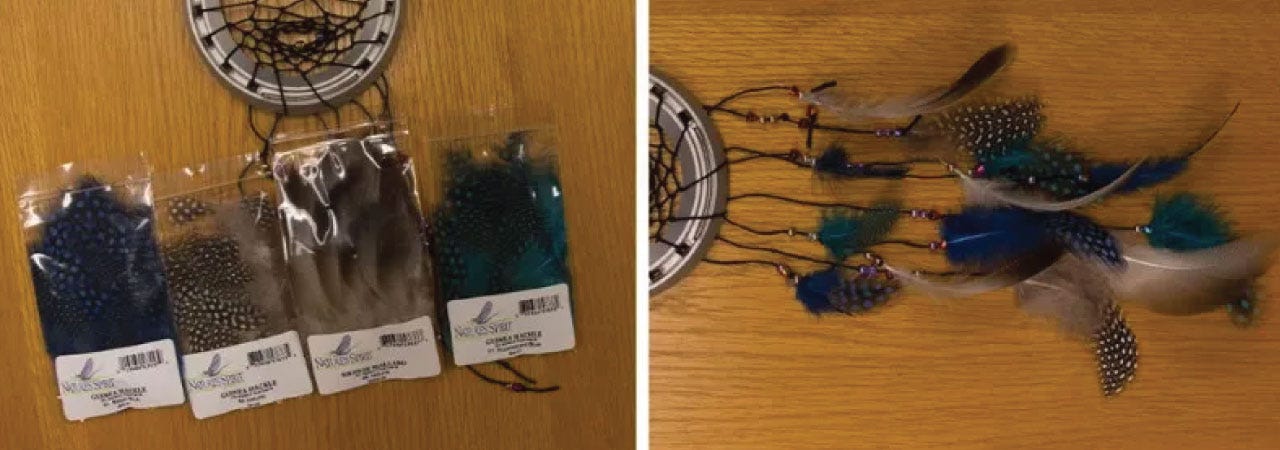
Step 5: Embellish & Decorate
This is my favorite part. First you bead and then you feather. Choose how many strings you want to dangle from your dream catcher and tie them off to the loops on the backside of your dream catcher. I like to keep mine pretty simple and just tied four. I tied them all different lengths.
Need some feathers and beads for your project? You can find them here
Beading is easy when you have super thin string. But if your sting is a little thicker like mine, its easier to bead them onto thin wire first and pull your string through the end and slide your beads onto your string.
Be as creative as you like with your beads. Do patterns or go random. Tie knots in your string to keep your beads at different lengths.
Adding feathers is the easiest step. Grab a feather and slide the end piece into a bead and push down over a knot to secure. (Tip: add a tiny drop of super glue to the end of the feather before pushing into a bead) Add as many feathers as you want. The more beads you add the more feathers you can add.
Step 6: Tie & Hang
Tie a small piece of string to each side of your horseshoe top to make a hanger.
BE CREATIVE. THE POSSIBILITIES ARE ENDLESS.
Your dreamcatcher can be as unique as you want it to be. You can also find more DIY projects and recipes on the North 40 Pinterest page.