How To Graft Tomatoes for Increased Yield and Disease Resistance
Anytime there’s a chance to grow bigger and better tomatoes, I’ll grab it. Years ago I learned about grafting them as a way to raise longer season varieties in our short season climate, which was a big benefit in my eyes since so many of the larger tomatoes are better suited for regions with over 85 days of warm growing season. We might have that in the total season, but it’s rarely optimum tomato growing weather during the entire time.
Grafting also provides an increased level of disease resistance, especially to Fusarium and Verticillium, which particularly plague heirloom varieties that do not have resistance bred into their makeup. The good news is besides disease resistance, the plants demonstrate increased production with many growers claim up to a 40 percent greater harvest.
From commercial growers to the home garden
Grafting began with commercial growers as a way to raise tomatoes in the same space without losing entire crops to soil-borne pathogens. In the large greenhouses they can’t necessarily rotate crops since they’re in large-scale tomato production. As a result, after a few years these diseases either kill the plants or reduce production.To resolve this situation, grafting the desired varieties onto a disease resistant and vigorous root stock allowed growers to raise tomatoes in the same area without experiencing the problems.
To give home growers an opportunity to experience the same benefits they made the plants, seed and plant companies starting selling grafted tomatoes, as well as the grafting supplies. When I looked at what seed and plant companies charged, which was roughly $10 a plant, I decided to try it on my own.
I grafted my aunt’s favorite, the ‘Brandywine’ (a variety that originated in the Midwest, but it doesn’t do nearly as well here with our cool summer nights), on a ‘Maxifort’ hybrid rootstock, then planted the variety in my little greenhouse alongside an un-grafted ‘Brandywine’. The results were impressive. We were picking red ‘Brandywines’ by the end of July, and the single grafted plant took over the greenhouse. By August I had to crawl underneath it to reach anything beyond it. Since I have limited space in the garden, if I can plant half the number of plants for the same amount of tomatoes at the end of the season, it’s definitely worth the investment.
Tools for grafting
You’ll need a rootstock and your favorite variety for the top plant, some sort of clip to attach the rootstock and the scion, clean containers, fresh potting soil, a razor or utility knife (or there are even nifty grafting knives available), a skewer or stick support of some kind, and a plastic bag large enough to go over the plant to act as a healing tent.
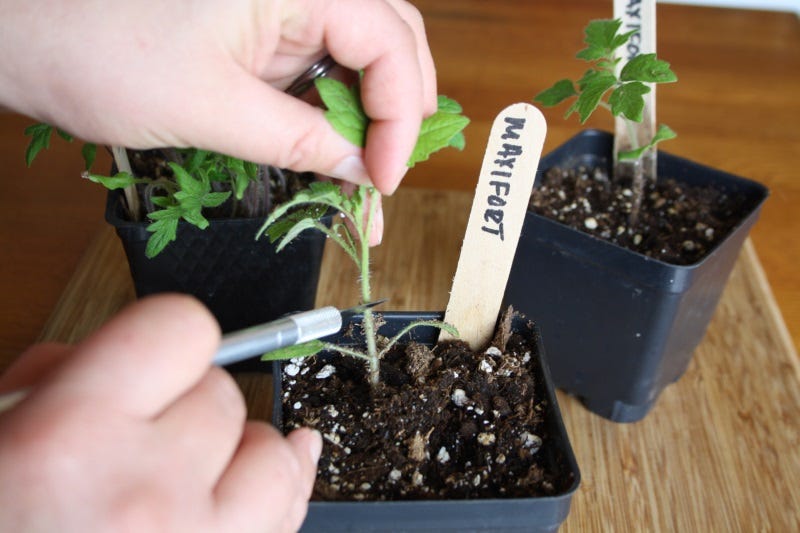
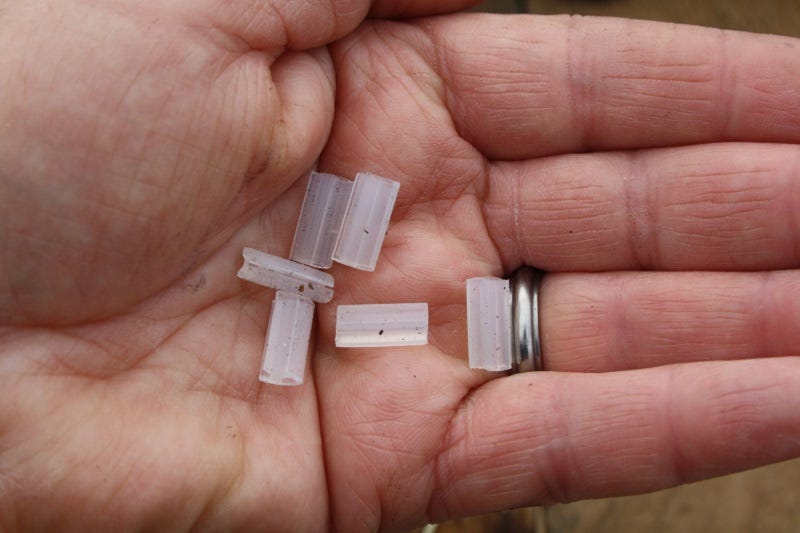 These are examples of the tiny silicon clips that are used for top grafting.
The clips are what holds the plants together. I’ve heard of people using tape, but it is unwieldy to try to hold the plant together while taping and it can harm the plant when you remove it. These clips make it fairly simple to join the plant halves. If you are top grafting small plants you can use a 1.5 mm or 2 mm silicon clip. The clip simply pinches open and slides over the rootstock providing a tube where you attach the two plants. For plants with stems larger than 2 mm, or with a side grafting technique, go with the clothespin type clips, which have a little spring. These give you much greater latitude on the size of plants you use.
 Cut the scion at an angle.
The most important piece of the grafting puzzle is the rootstock. People often wonder if you can just use a normally vigorous tomato variety. I can’t stress enough that the key to successful grafting is the rootstock. If you don’t use the specialized varieties that are grown for this incredible vigor and disease resistance, there’s no point in doing it at all.
There are more rootstock varieties on the market each year, but ‘Maxifort’ remains my favorite. With its vigorous growth on my indeterminate plants making the growth rate and production is impressive. Other options include ‘Estamino,’ which is geared towards situations with a shorter growing season or with small-fruited varieties, or ‘Colossus’ that boasts both dynamic growth and marked disease resistance to soil borne pathogens. The seeds cost more, running $23 for $28 for a packet of 50, but there’s good reason for it.
 Join the two.
Top grafting smaller plants
Top grafting can be tricky because you’re cutting the plant in half, but once you get the hang of it, you know quickly whether your scion took. Yo work with the plants when they the stem is only 1-2 mm wide since you need the silicone clips to fit over the stem.
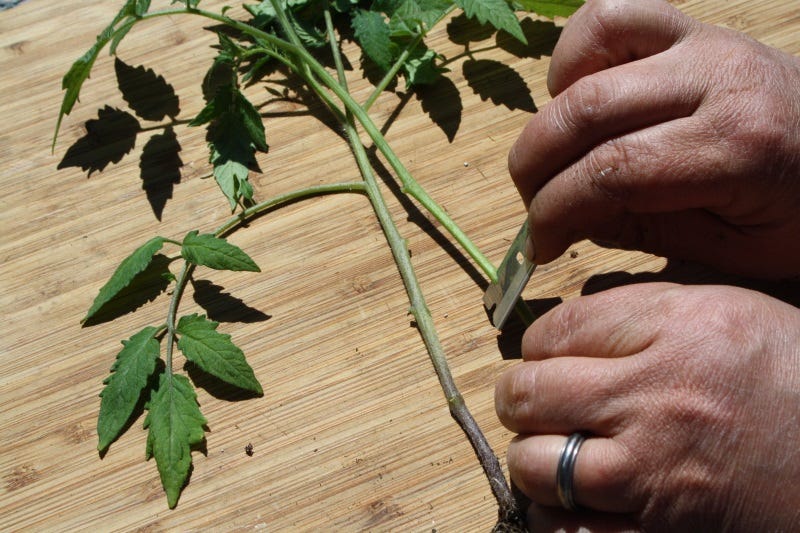
 Carefully cut the rootstock at an angle for top grafting.
Carefully remove a rootstock plant and a scion, and place them on a cutting surface. Line up the stems so they match in diameter. Taking your knife or razor, cut the stem at roughly a 45 degree angle. Immediately toss away the top of the rootstock plant. (I’ve made the mistake of not doing this, and grafted the plant back together!) Do the same with the roots of the scion.
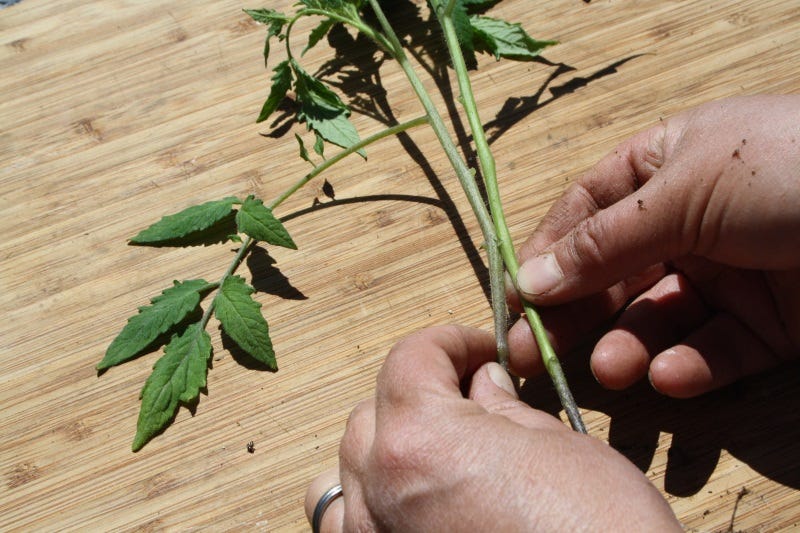
Now pinch open the silicone clip and place it over the rootstock section leaving half the length of the clip available to receive the scion. Slide the scion into the clip matching up the angles of the cut so the plant can grow together. Plant this newly joined plant in a different container with moistened soil.
Use a skewer to support the plant, mist with water, and place a plastic bag over the top to create a humid environment. Place it in a warm place out of the direct sunlight. Keep it here for about 4 to 6 days. The plant should obviously be growing (if it wilts, you have a problem). After the 4-6 days, remove the plastic bag, and give it another few days before setting it under lights. Water, if necessary.
The ease of side grafting
One of my greatest problems in the spring is having the plants grow too fast for top grafting. As a result, side grafting larger plants bought me time, plus it’s a bit easier with a higher success rate, but it does take a little finesse to make the cut just right.
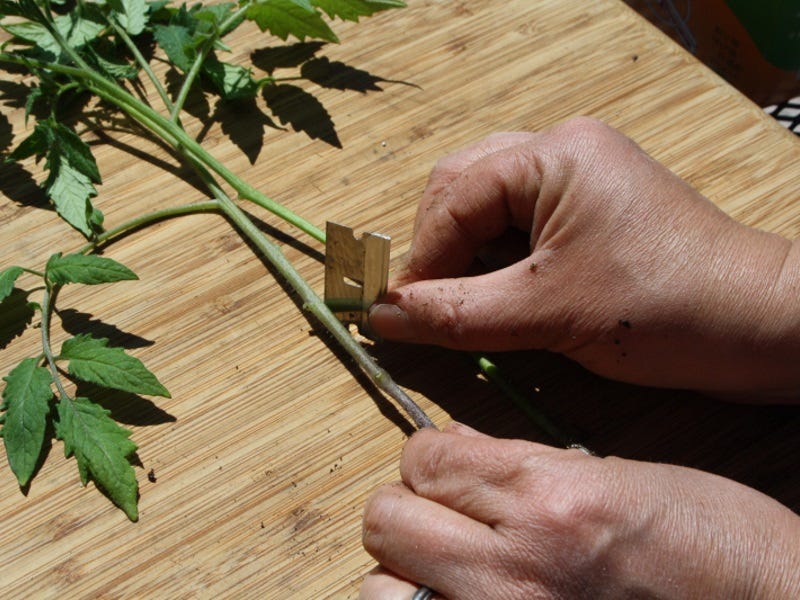
Cut the stem of the rootstock at an angle for sidegrafting.You will want larger plants (at least 3 mm). Start the same way by removing a rootstock and scion plant, and set them side by side on a cutting surface. I often trim off the top, leaving a few leaves, of the rootstock plant just so I know which is which.
The cut is the big difference. Instead of cutting all the way through, make a cut ¾ of the way through the stem at roughly a 45 degree angle in one plant. Do the same with a cut in the opposite direction in the other plant. Join them together, and use the spring loaded clip to hold them in place.
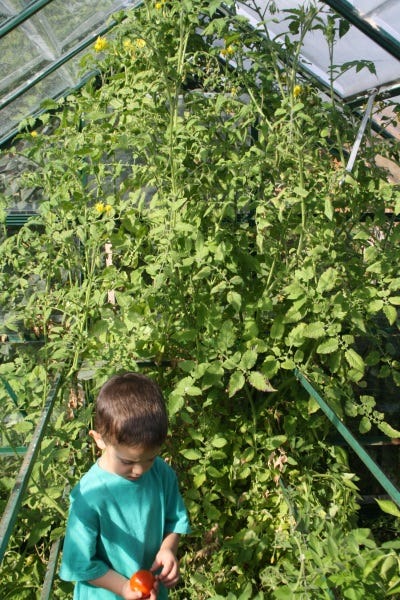 The grafted tomato pretty much took over the greenhouse last year.
Carefully plant both plants in a container. The reason there is greater success with side grafting is because the roots of both the plants are growing. It usually takes a week for the joint to grow together before you can remove the clip. After this point, you can finish trimming off the top of the rootstock variety and cut the roots of the scion.
Planting grafted tomatoes in the garden
When you plant grafted tomatoes in the garden, be sure to give them plenty of room. Plus, unlike typical tomato plants where you bury the stem, do not plant the graft below the soil line or you will have the rootstock take over, negating the purpose of grafting.
Make grafting the norm
Tomato grafting is ideal for gardeners who don’t have a lot of space, but want to grow a fair number of tomatoes. Plus, it’s just another technique that keeps gardening interesting.